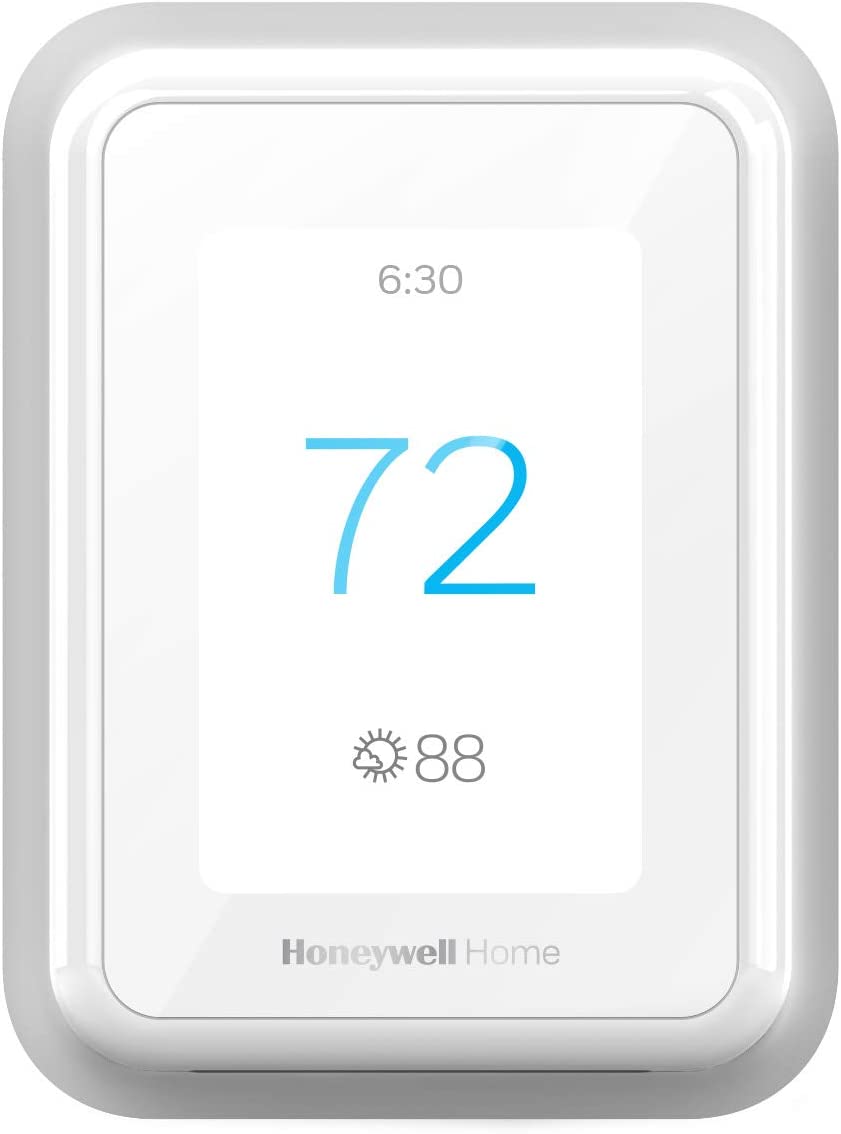
Best non wifi programmable thermostat reviews

According to the Environmental Protection Agency (EPA), heating and cooling costs account for about half of the average American household’s energy expenses. There are dozens of energy-saving strategies that you can employ to reduce your monthly energy bills, from turning out lights when you leave a room to adding insulation to your attic. One of the easiest, most effective and affordable ways to cut energy costs is to install a non wifi programmable thermostat.
Lower Your Energy Bills Up To 10 %
You can save about $180 each year from these savvy devices, according to the EPA, or around 10 percent of your energy bills (many thermostat manufacturers claim higher savings than that – some up to 33%). Most units cost less than your family might spend on a dinner and a movie.

The digital thermostats display the current time and temperature. You flip through screen displays to program them. While you have the option to manually alter the current temperature at any time, savings come from careful programming.
Scheduled to Turn On & Off Automatically
You can customize the settings to fit your household’s schedule, automatically turning heating and cooling systems off when family members are away from home and back on again in time to ensure that the temperature is comfortable when everyone’s at home.
Most models let you set different schedules for weekdays and weekends, with several temperature changes each day. You can program them to lower the temperature at your usual bedtime and raise the temperature so that you wake up to a comfortably warm home.

Best non wifi programmable thermostats

From the list compiled below, you can buy some of the best non wifi programmable thermostat also searched as best non smart thermostat as the word wifi has become synonym with smart although it is not. You can buy them for a minimal investment and get substantial savings.

Programming option.

The best programmable thermostat has flexible program settings.  One programming option is a 7 day program which allows you to choose a unique program for each day of the week with up to four periods per day.  This option is great for people with very busy schedules.  5-1-1 programming allows a person to have one setting for the weekdays and a separate one for each of the weekend days.  5-2 setting also allows for different programming options for the weekday and the weekend, but it is programmed for both weekdays together and not individually.  And finally, the one week setting, allows a different program for each week.  Especially helpful with those who travel often.

Compatibility

Make sure the thermostat you’re buying will work with your heating/cooling system because while most thermostats work with common cooling and heating systems, some might have exceptions.Also the heating and cooling stages in your home is crucial before buying your thermostat.Heating and cooling stage in your home can be determined based on the wiring labels in your home.Wire labelled Y is for air conditioner and the one labeled white is for heating furnace. If you have Yellow wire labeled Y1 and Y2 you have two stage cooling and similarly if W is labeled W1 and W2 you have two stage heating otherwise you have one stage heating or cooling.Most thermostat listed above have maximum 2 stage heating and two stage cooling. This is the maximum you can expect in this price range.Also check the compatibility for heat pumps.Most heat pumps have single heating or cooling speeds,but some have auxiliary compressor unit in case of cooler conditions.Most thermostats are compatible with one and some with two/multi stage heat pumps.

Higher/adjustable temperature swing for heating and cooing

Most digital thermostat comes with +-1 temperature differential.It means the thermostat switches on or off a HVAC device (AC or furnace) at one above or below the  set  temperature respectively .It is called the switching cycle of the HVAC device.Some thermostat like lux however have maximum +-3 setting by changing which you can adjust the number of cycles.Others like Honeywell allows you to directly define number of cycles. Controlling number of cycles is helpful because it  will reduce wear and tear of HVAC device by frequent switching ans also saves power bill because it is the at the start that a HVAC device ex Air conditioner draws the maximum power.Above list includes some models that have the adjustable switching cycle.

Auto Heat or cool mode.

We know that we can switch the mode to cooling(AC) in case of hot day/seasons and vice versa in cold days/seasons.But what when the temperature in not so predictable and there is higher swing in temperature in days and night(warmer day and cooler night). Some thermostats comes with option to automatically change mode if temperature remain above or below the set point for some time and the the selected mode HVAC device(AC or furnace) was not triggered on command.Not all thermostats has this feature but  those that do comes with a price.

Batteries

In case of programmable only thermostat with no radio the batteries can last for about one year or so and if it runs on batteries you don’t necessarily need to connect the C wire to the thermostats and vice versa.When used as a backup it will power the thermostat and save the program in the memory in case of power outage.But most models nowadays have battery independent memory.Most models will have  have replace batteries alarm showing months before it die out.

Temperature hold

All thermostat comes with manual program override called the temporary or permanent hold.When you put the thermostat on hold the temperature set point is given by you until you take the hold off.There is also a different vacation mode in which you can also determine the the number of days after which it will come on to its normal programmed schedule.Above list have mentioned whether the model has this feature or the normal hold.

Other features

Since there are a quite a lot of models and brands competing in the programmable domain different models come with unique features that can also be an advantage over others like easy  interface for programming and controlling.Furnace filter change reminder based on elapsed time,Screen with basic touchscreen, large display or back lights etc.

Is it possible to save money using programmable thermostat ?

If you want to know ether it is possible or not to save money using programmable, the answer is of course it is.The correct question then is how and whether using a programmable thermostat is any advantage over a basic setback thermostat.
As with any machine it can only be useful to certain extent and its efficiency depends on the person using it.This is true even for modern smart thermostats.Here is a simple chart and proposed saving for simple household.
In general 1 degree setback (less in winter,more in summer) for 8 hrs result in 1 % saving in energy consumption.

This is what experts say.

My first reaction to people who say that thermostat setbacks don’t work has been to say that they need to go back and study the basic physics of heat transfer. After going through all this and giving Kidd a chance to post his views here in the Energy Vanguard Blog, that’s still my view.

No, actually that’s not just my view. The fundamental principles of physics are well established, and the research shows that thermostat setbacks can save energy. Anyone who thinks otherwise is wrong.

Source

Many people who have programmable thermostats leave them in the ‘permanent hold’ position, as we do because we don’t have a regular enough schedule. A lot of people with either kind of thermostat use setbacks to save energy.

Thermostat setbacks are where the energy savings come from.

Programmable thermostats may or may not be programmed or manually adjusted for setbacks.

So, the answer to the title question is:

No, programmable thermostats do not save energy. Not without some help from you anyway.

Source

Thermostat Myths: Busted

  • Your thermostat can’t control the intensity of your furnace
  • Setbacks and setups do save you money
  • Programmable thermostats can save you $180 annually if you set them right

Source

Programmable thermostats can save money — not just in theory — buit only if they’re used correctly. Pick your set points based on your household’s habits, and then leave them there. Don’t fuss with the thermostat. The following is a typical energy-efficient program:

Source 

Remember its your behaviors and motivation to save energy and ultimately energy bills that will be the real factor.A programmable thermostat can only help you achieve that goal.

10 Best smart, wifi thermostat for boilers

As we strive for energy efficiency and smarter home automation, the role of thermostats has become increasingly significant. When it comes to controlling heating systems, especially boilers, choosing the right thermostat can make a world of difference. Whether you’re looking to upgrade your existing setup or are in the process of installing a brand-new boiler, having a thermostat that complements its functionality is crucial.

In this comprehensive guide, we will explore the world of thermostats specifically designed for boilers. We will delve into the key features, types, and considerations to keep in mind when selecting the best thermostat for your boiler system. By the end, you’ll have a clear understanding of what to look for and be equipped with the knowledge needed to make an informed decision.

In this era of increased awareness about carbon footprints and energy consumption, having a thermostat that can optimize your boiler’s performance and keep your home comfortable is paramount. An efficient thermostat can help you save on energy bills, reduce greenhouse gas emissions, and create a more sustainable living environment.

What is boiler and types of boiler in USA

A home boiler is a central heating system that generates heat to warm a residential space and provide hot water. It consists of a boiler unit that heats water, which is then circulated through pipes and radiators or underfloor heating systems to distribute heat evenly throughout the home. Boilers are commonly fueled by natural gas, oil, propane, or electricity.

In the United States, the most prevalent type of boiler used in residential settings is the natural gas-fired condensing boiler. These boilers are highly efficient, utilizing the heat produced during combustion to preheat cold water entering the boiler. This process maximizes energy efficiency and reduces fuel consumption, resulting in lower energy bills and reduced environmental impact.

Condensing boilers are known for their excellent performance, achieving efficiency levels of up to 98%. They extract heat from the flue gases, which are then condensed into liquid form, releasing additional heat energy. This condensation process helps recover latent heat and further improves the boiler’s efficiency.

Another type of boiler commonly found in the USA is the oil-fired boiler. While less popular due to the availability and pricing of oil, these boilers are still used in areas where natural gas infrastructure is limited. Oil-fired boilers operate similarly to natural gas boilers but use oil as their fuel source.

It’s worth noting that electric boilers are also available in the US market. These boilers use electricity as their energy source and are compact and easy to install. However, they tend to be less energy-efficient compared to natural gas or oil boilers and may result in higher electricity costs.

Smart ,wifi boiler thermostat

Ecobee 4 and 3

Ecobee is a well-known brand in the smart thermostat market, offering advanced features and energy-saving capabilities.

Ecobee4 Thermostat:

The Ecobee4 is a feature-rich smart thermostat that combines temperature control, voice control, and home automation capabilities. It offers a variety of advanced features and is known for its versatility and compatibility with different HVAC systems, including boiler systems.

Compatibility with Boiler Systems:

The Ecobee4 is compatible with most boiler systems, including single-stage and multi-stage boilers. It supports a wide range of heating equipment, such as boilers with or without external transformers, zone valves, and radiant heating systems.

To ensure compatibility with your specific boiler system, it’s essential to check the Ecobee website or consult the manufacturer’s documentation for a comprehensive list of supported systems and compatibility requirements.

Integration and Control:

The Ecobee4 integrates with a variety of boiler system components, allowing you to control your heating system efficiently. It utilizes the Ecobee app, which is available for both iOS and Android devices, to provide remote access and control of your thermostat from anywhere.

The thermostat also supports voice control through popular voice assistants such as Amazon Alexa and Google Assistant. This allows you to adjust temperature settings, schedule changes, and access other thermostat features using voice commands.

Energy Saving Features:

The Ecobee4 comes equipped with various energy-saving features designed to optimize comfort and reduce energy consumption. These features include:

a. Smart Home/Away: The thermostat uses occupancy sensors and geofencing technology to detect when the house is occupied or empty. It adjusts the temperature accordingly, helping to conserve energy when you’re away.

b. Follow Me: The Ecobee4 can detect which rooms are occupied based on its occupancy sensors. It focuses on heating or cooling those occupied areas, providing personalized comfort while saving energy in unoccupied spaces.

c. Smart Recovery: The thermostat learns the heating patterns of your home and calculates the time needed to reach the desired temperature. By doing so, it ensures that the temperature is comfortable at the scheduled time while avoiding unnecessary heating, thus saving energy. It is also called Smart response technology in Honeywell thermostat.

Click here for more detail, price, reviews and ratings of Ecobee 4 thermostat

Ecobee3 Lite Thermostat:

The Ecobee3 Lite is a more budget-friendly option that offers essential features and functionality for smart temperature control. Although it is a simplified version of the Ecobee4, it still provides compatibility with boiler systems.

Compatibility with Boiler Systems:

Similar to the Ecobee4, the Ecobee3 Lite is compatible with most boiler systems, including single-stage and multi-stage boilers. It supports various heating equipment, making it suitable for a wide range of boiler installations.

Note that it may not be compatible with central heating systems having 3 or 4 stages

Integration and Control:

The Ecobee3 Lite offers integration with popular voice assistants like Amazon Alexa, Google Assistant, and Apple HomeKit. It allows you to control your thermostat using voice commands for hands-free operation.

The thermostat also provides remote access and control through the Ecobee app, enabling you to manage your thermostat settings from your smartphone or tablet.

Energy Saving Features:

While the Ecobee3 Lite may not have all the advanced features of the Ecobee4, it still incorporates essential energy-saving features. These features include:

a. Smart Home/Away: The thermostat uses occupancy detection to adjust the temperature when no one is home, helping to reduce energy consumption during vacant periods.

b. Scheduling: The Ecobee3 Lite allows you to create customized schedules to align with your lifestyle. By optimizing temperature settings based on your daily routine, you can minimize energy waste.

c. Energy Reports: The thermostat provides energy reports that offer insights into your energy usage patterns. These reports can help you identify opportunities for further energy savings and make adjustments to optimize your heating system’s efficiency.

Difference between 2 models

Click here for more detail, price, reviews and ratings of Ecobee 3 Lite thermostat

Nest 3rd Gen and Nest E

Nest thermostats are known for their sleek design, user-friendly interface, and smart functionality. In this article, we will focus on two popular models: the Nest 3rd Generation (Nest Learning Thermostat) and the Nest E Thermostat. We will explore their features and specifically discuss their compatibility with boiler systems, which are commonly used for heating in many homes.

  1. Nest 3rd Generation (Nest Learning Thermostat):The Nest 3rd Generation, also referred to as the Nest Learning Thermostat, is a top-of-the-line smart thermostat that offers advanced features and energy-saving capabilities.

Compatibility with Boiler Systems: The Nest 3rd Generation is compatible with most boiler systems, including single-stage and multi-stage boilers. It supportsm ost 24V heating and cooling systems like gas, electric, forced air, boilers with or without external transformers,heat pump, radiant, oil, hot water, solar and geothermal and even those with underfloor heating.

Integration and Control: The Nest 3rd Generation integrates with the Nest app, available for both iOS and Android devices, allowing you to control your thermostat remotely. Through the app, you can adjust temperature settings, set schedules, and monitor energy usage.

Additionally, the Nest Learning Thermostat has the ability to learn your temperature preferences and create a personalized schedule based on your habits. Over time, it adapts and optimizes temperature settings to maximize comfort while minimizing energy consumption.

The thermostat also supports voice control through various voice assistants, including Google Assistant and Amazon Alexa.

Energy Saving Features: The Nest 3rd Generation incorporates several energy-saving features to help reduce energy consumption:

a. Auto-Schedule: The thermostat learns your preferred temperature settings and creates a schedule based on your usage patterns. It can automatically adjust the temperature when you’re away, optimizing energy efficiency.

b. Home/Away Assist: Using built-in sensors and geofencing technology, the Nest Learning Thermostat can detect when you are at home or away. It adjusts the temperature accordingly, conserving energy when you’re not present.

c. Energy History: The thermostat provides detailed energy usage reports and insights through the Nest app. This information helps you track your energy consumption and make informed decisions about energy-saving adjustments.

Click here for more detail, price, reviews and ratings of Nest 3rd Gen thermostat

  1. Nest E Thermostat: The Nest E Thermostat is a more budget-friendly option compared to the Nest 3rd Generation. It offers essential smart thermostat features while maintaining compatibility with boiler systems.

Compatibility with Boiler Systems: Similar to the Nest 3rd Generation, the Nest E Thermostat is compatible with most boiler systems, including single-stage and multi-stage boilers.

Note-Nest E is not compatible beyond 2 stages of heating and 1 stage of cooling)

For ex- Two stages of cooling and two or three stage furnace  heating 

Also do not work with acessories like humidifier or ventilators

Integration and Control: The Nest E Thermostat integrates with the Nest app, allowing you to control your thermostat remotely and access its features from your smartphone or tablet. The app provides a user-friendly interface for adjusting temperature settings, setting schedules, and monitoring energy usage.

While the Nest E Thermostat lacks the learning capabilities of the Nest 3rd Generation, it still offers basic scheduling options. You can create custom temperature schedules to align with your daily routine, optimizing energy usage accordingly.

Energy Saving Features: The Nest E Thermostat incorporates energy-saving features to help reduce energy consumption:

a. Home/Away Assist: Similar to the Nest 3rd Generation, the Nest E Thermostat utilizes occupancy detection and geofencing technology to determine when you’re home or away. It adjusts the temperature settings accordingly to save energy when you’re not at home.

b. Energy History: The Nest E Thermostat provides energy usage reports and insights through the Nest app. You can track your energy consumption patterns, identify areas for improvement, and make adjustments to optimize energy efficiency.

c. Eco Mode: The Eco Mode feature on the Nest E Thermostat helps save energy by automatically adjusting the temperature to a more energy-efficient level when no one is home. It ensures that you’re not wasting energy on heating or cooling an unoccupied space.

Click here for more detail, price, reviews and ratings of Nest E thermostat

Honeywell lyrics T6 and T5 thermostat

Honeywell Lyric T6

The Honeywell Lyric T6 thermostat is a versatile and advanced device designed to provide precise temperature control and energy efficiency in residential heating systems. It is compatible with a wide range of boilers, making it a popular choice for homeowners seeking a reliable and smart thermostat solution.

The Lyric T6 thermostat supports both 24-230V on/off and OpenTherm(R) gas boilers and combi-boilers with upto 3 heat stages and 2 cool staged but not compatible with pellet stove boilers and electric base board heating.

It requires 24 V a C wire.

The Honeywell Lyric T6 thermostat is compatible with IFTTT (If This Then That), a popular web-based automation platform that allows users to create custom connections and interactions between different devices and services. This compatibility enhances the functionality of the Lyric T6 thermostat and enables users to integrate it into their existing smart home setups or create unique automation scenarios.

For example, users can set up an applet that triggers the Lyric T6 thermostat to adjust the temperature when certain conditions are met. This could include turning on the thermostat when a specific location-based trigger is activated or adjusting the temperature based on the weather forecast retrieved from a weather service. The possibilities are virtually endless, limited only by the available triggers and actions within the IFTTT ecosystem.

Through IFTTT, the Lyric T6 thermostat can be integrated with a wide range of devices and services, such as smart lighting systems, home security cameras, voice assistants, and more. This integration allows for seamless automation and coordination between different smart home components, providing users with a centralized and streamlined control over their connected devices.

To set up IFTTT compatibility with the Lyric T6 thermostat, users need to create an IFTTT account and follow the instructions provided by Honeywell. The process typically involves linking the thermostat to the IFTTT service and selecting the desired triggers and actions to create custom applets.

One of the key features of the Lyric T6 thermostat is its ability to adapt to different types of heating systems. It uses advanced algorithms to optimize the boiler’s performance and reduce energy consumption while maintaining a comfortable indoor climate. By learning the heating patterns and preferences of the occupants, the thermostat creates a personalized schedule that maximizes energy efficiency and minimizes wasted heating cycles.

The Lyric T6 thermostat is designed for easy installation and setup. It can be installed on the wall and can also be integrated with home automation systems like Apple HomeKit, Amazon Echo or Google Home Assistant allowing users to control the thermostat remotely through their smartphones or other connected devices.

A higher version Honeywell T6(R) is totally wireless does not need to be installed on wall and can be kept anywhere.

It supports geofencing, which enables the thermostat to automatically adjust the temperature based on the occupants’ location, ensuring that the home is always at the desired temperature when they arrive. The thermostat also provides energy usage reports and insights, allowing homeowners to track their heating consumption and make informed decisions about energy-saving measures.

The Resideo app(Earlier known as Honeywell home app) serves as your primary control center, giving you access to all your in-home devices no matter where you are. Whether it’s lights, locks, cameras, thermostats, or more, you can conveniently manage and control them from any mobile device. The app also provides real-time alerts when any smart home device is triggered, and it keeps a comprehensive history of system events for your review and reference.

Click here for more detail, price, reviews and ratings of Honeywell Lyric T 6 thermostat

Like Nest and Ecoobee Honeywell also has a lighter version T5 which is also compatible with most boiler system. 

Honeywell T5 thermostat

The main difference being no dual fuel and IFTT in Honeywell T5 and 2 stage heat/2 cool as compared to 3 Stage heat and 2 cool in T6.

Click here for more detail, price, reviews and ratings of Honeywell Lyric T 5 thermostat

Honeywell RTH9585WF – WiFi Boiler Thermostat

The Honeywell RTH9585WF WiFi Boiler Thermostat is a popular choice for homeowners looking to upgrade their thermostat to a smart and connected device. With advanced features and compatibility with boiler systems, it offers convenient control and energy-saving capabilities. Let’s explore its details, with a particular focus on boiler compatibility.

Note- Not a auto scheduling or learning thermostat commonly called smart thermostat.

Compatibility with Boiler Systems:

The Honeywell RTH9585WF WiFi Boiler Thermostat is designed to be compatible with a wide range of boiler systems viz Forced air (gas, oil or electric), hot water and steam, and heat pumps with electric backup. It do not work with 120-240V electric baseboard heat and a C-Wire is required.

Integration and Control: As the name suggests, the Honeywell RTH9585WF WiFi Boiler Thermostat offers WiFi connectivity, enabling remote access and control via the Honeywell Total Connect Comfort app. This means you can conveniently adjust temperature settings, create schedules, and monitor your heating system from your smartphone or tablet.

The thermostat also supports voice control through popular voice assistants like Amazon Alexa and Google Assistant. This allows you to adjust temperature settings and control your heating system using simple voice commands, adding a level of hands-free convenience.

Energy Saving Features: The Honeywell RTH9585WF WiFi Boiler Thermostat incorporates several energy-saving features to help optimize your heating system’s efficiency:

  1. Smart Scheduling: The thermostat allows you to create customized schedules to align with your lifestyle. By setting different temperature preferences for specific times of the day, you can ensure efficient heating while minimizing energy waste.
  2. Geofencing: This feature utilizes your smartphone’s location to detect when you are leaving or approaching home. When you’re away, it can automatically adjust the temperature to an energy-saving level. As you approach home, it can start preheating, ensuring a comfortable environment upon your arrival.
  3. Intelligent Comfort Control: The thermostat includes advanced algorithms to maintain a consistent and comfortable temperature while optimizing energy usage. It continuously learns your heating patterns and adjusts accordingly, reducing unnecessary heating cycles and improving overall efficiency.

Additional Features: Apart from boiler compatibility and energy-saving capabilities, the Honeywell RTH9585WF WiFi Boiler Thermostat offers several other noteworthy features:

  1. Touchscreen Display: The thermostat features a large, easy-to-use touchscreen display that allows for intuitive navigation and temperature adjustments.
  2. Customizable Color Themes: You can personalize the thermostat’s appearance by choosing from a variety of color themes to match your home decor.
  3. Filter Change Reminder: The thermostat provides reminders to change your HVAC system’s filters, ensuring optimal performance and indoor air quality.
  4. Weather Information: The thermostat can display local weather information, keeping you informed about outdoor conditions and helping you make informed decisions about your heating system.

Installation Considerations: Installing the Honeywell RTH9585WF WiFi Boiler Thermostat may require specific wiring connections based on your boiler system. It’s advisable to consult the product documentation or seek professional assistance to ensure proper installation and compatibility with your specific setup.

Click here for more detail, price, reviews and ratings of Honeywell RTH9585WF thermostat

Emerson Sensi ST75

The Emerson Sensi ST5 Thermostat is a smart and versatile thermostat that offers a range of features for convenient temperature control and energy savings. With a particular focus on boiler compatibility, let’s delve into the details of this thermostat.

The thermostat is compatible with conventional Heating like Gas/Oil/Propane Furnace, Electric Furnace, Boiler/Radiant with upto 2 stage of heating and with both heating and cooling it has 2H/1C or 1 C/2H.
 Note- Emerson sensi has 4 models that they call smart thermostat viz with following difference
  • Sensi Lite and Sensi smart thermostats: Only requires a “C” wire with heat pumps, heat-only systems, and cool-only systems.
  • Sensi Touch and Touch 2 smart thermostats: Requires a “C” wire for all applications.
Integration and Control:
The Sensi ST5 Thermostat offers multiple ways to control and monitor your heating system:
Mobile App: The thermostat can be controlled remotely via the Sensi mobile app, available for iOS and Android devices. This allows you to adjust temperature settings, create schedules, and monitor energy usage from anywhere, providing flexibility and convenience.
Voice Control: The Sensi ST5 Thermostat is compatible with popular voice assistants, including Amazon Alexa and Google Assistant.
Geofencing: The thermostat supports geofencing technology, which uses your smartphone’s location to determine when you’re leaving or approaching home. It can automatically adjust the temperature settings to save energy when you’re away and ensure a comfortable environment upon your return.
Energy Saving Features:
The Sensi ST5 Thermostat incorporates several energy-saving features to help you optimize energy usage and reduce heating costs:
Flexible Scheduling: You can create personalized schedules based on your daily routine, ensuring that your heating system operates efficiently when you need it. This feature allows you to set different temperature preferences for different times of the day or week.
Note- Not a auto scheduling thermostat like Ecoobee or Nest.
Usage Reports: The thermostat provides energy usage reports and insights through the Sensi mobile app. These reports allow you to track your energy consumption patterns and make informed decisions to further optimize efficiency.
Additional Features:
In addition to boiler compatibility and energy-saving capabilities, the Sensi ST5 Thermostat offers several other notable features:
Easy Installation: The thermostat is designed for easy installation and can be installed by most homeowners without professional assistance. The Sensi mobile app provides step-by-step instructions and helpful videos to guide you through the installation process.
Intuitive Interface: The thermostat features a user-friendly interface with a backlit digital display for easy visibility and temperature adjustments. It also has a simple control panel that allows you to access various settings and features with ease.
Smart Alerts: The Sensi ST5 Thermostat can send alerts and notifications to your mobile device to keep you informed about temperature changes, system status, and potential issues. This helps you stay proactive and address any concerns promptly.
Secure Connection: The thermostat ensures a secure and reliable connection through encryption and authentication protocols. This protects your personal data and ensures privacy while using the mobile app or remote control features.
Honeywell T9 wifi thermostat 

The Honeywell T9 Wi-Fi thermostat offers several features designed to provide convenience, energy savings, and comfort in your home. Here are the key features of the Honeywell T9 Wi-Fi thermostat:

  1. Auto Home and Away Mode: With the T9 thermostat, you can adjust your thermostat from anywhere using your mobile device. Additionally, the thermostat has an Auto Home and Away mode that allows your home to automatically react to your schedule using geofencing technology. It can detect when you leave home and adjust the temperature to save energy, and when you’re on your way back, it can ensure a comfortable temperature upon your arrival.
  2. Multi-Room Focus: The T9 thermostat supports the addition of Smart Room Sensors (sold separately) with range upto 200 feet. By adding these sensors to different rooms, you can prioritize and focus the temperature control in those specific areas, providing comfort where it matters to you the most. Only single sensor is provided but you can add upto 20 additional sensors.
  3. Wide Compatibility: The T9 thermostat is compatible with various heating and cooling systems, including forced air (gas, oil, or electric), hot water and steam systems, and heat pumps with electric backup. However, it does not work with electric baseboard heat (120-240V).
  4. C-Wire Requirement: The T9 thermostat typically requires a C-wire (common wire) for power. This wire provides continuous power to the thermostat, ensuring stable operation. Before purchasing the T9 thermostat, it’s recommended to check if your home’s heating and cooling system has a C-wire or if you need a power adapter to support the thermostat.
  5. Smarter, Simpler Setup: The T9 thermostat comes with everything you need in the box, including a power adapter for compatibility with most homes. The thermostat is designed for easy installation and setup, and it intuitively identifies your home’s heating and cooling system type, making it user-friendly for DIY installation.
  6. Energy Savings and Rewards: By using the T9 thermostat, you can save energy and potentially qualify for energy savings rebates offered by your energy provider. Additionally, eligible customers may be able to enroll in their local utility’s “Demand Response Program,” which rewards you for allowing slight adjustments to your AC or furnace temperature settings during high energy demand periods.
  7. Smart Home Integration: The T9 thermostat is compatible with various smart home platforms, including IFTTT, Google Assistant, Amazon Alexa, iOS, and Android. This allows you to control and manage your thermostat through voice commands or integrated smart home systems.

Click here for more detail, price, reviews and ratings of Honeywell T9 thermostat

Honeywell T10

An upgraded version Honeywell T10 thermostat has same compatibility with like T9 with boilers but has some additional feature like T10 can handle dual fuel system like Gas and diesel or Gas furnace and heat pump.

Also T10 can control humidity and ventilation.

Is honeywell evohome thermostat compatible with Apple homekit?

Honeywell Evohome did not have native support for Apple HomeKit. However, you can potentially make it compatible with HomeKit using Homebridge—a third-party software that acts as a bridge between non-HomeKit devices and the Home app on iOS devices. Please note that the steps and plugins mentioned here might be subject to updates or changes, so it’s a good idea to refer to the latest documentation for accuracy

Homebridge is typically installed on a computer or a Raspberry Pi, acting as a bridge between non-HomeKit devices and the Home app on iOS devices.

Here are the general steps to install Homebridge on a computer:

  1. Prepare Your Environment:
    • Ensure that you have Node.js and npm (Node Package Manager) installed on your computer. You can download them from the official Node.js website: Node.js Downloads.
  2. Install Homebridge:
    • Open a terminal or command prompt on your computer.
    • Install Homebridge globally using the following command:
      bash
      npm install -g homebridge
  3. Install Plugins:
    • Depending on the devices you want to connect to HomeKit, you may need to install additional plugins. For example, if you want to integrate Honeywell Evohome, you’ll need a plugin like homebridge-evohome.
    • Install plugins using commands similar to the following:
      bash
      npm install -g homebridge-evohome
  4. Configure Homebridge:
    • Create a config.json file in the Homebridge directory. This file contains information about the devices you want to connect and other settings.
    • An example configuration may look like this:
      json
      {
      "bridge": {
      "name": "Homebridge",
      "username": "CC:22:3D:E3:CE:30",
      "port": 51826,
      "pin": "031-45-154"
      },
      "platforms": [
      {
      "platform": "Evohome",
      "name": "Evohome",
      "username": "your_evohome_username",
      "password": "your_evohome_password"
      }
      ]
      }
  5. Run Homebridge:
    • Start Homebridge by running the following command:
      bash
      homebridge
    • Homebridge should start, and you’ll see a QR code on your terminal.
  6. Pair with HomeKit:
    • Open the Home app on your iOS device.
    • Tap the “+” icon to add a new accessory.
    • Look for Homebridge in the list of available devices and accessories.
    • Scan the QR code displayed on your terminal.

After completing these steps, Homebridge should be running, and your non-HomeKit devices, including those supported by plugins, should be accessible within the Home app on your iOS device.

Remember that Homebridge is a continuously evolving project, and there might be updates or changes in the installation process or compatibility with plugins. Always refer to the official Homebridge documentation for the most accurate and up-to-date information: Homebridge GitHub

Here’s a general guide on how you might use Homebridge to makeHoneywell Evohome compatible with Apple HomeKit:

  1. Install Homebridge:
    • Follow the installation instructions above to install Homebridge.
  2. Install the Evohome Plugin:
    • Search for a Homebridge plugin that supports Honeywell Evohome. You can find plugins by searching on the npm website or within the Homebridge community. Here is a link to one such  plugin. https://github.com/luc-ass/homebridge-evohome
    • bash
    npm install -g homebridge-evohome
  3. Configure the Plugin:
    • Add the Evohome plugin configuration to your Homebridge config.json file. You’ll need to provide details such as your Evohome username, password, and any other required settings.
    json
    "platforms": [
    {
    "platform": "Evohome",
    "name": "Evohome",
    "username": "your_evohome_username",
    "password": "your_evohome_password"
    }
    ]
  4. Run Homebridge:
    • Start Homebridge by running the following command in your terminal:
    bash
    homebridge
  5. Pair with HomeKit:
    • Open the Home app on your iOS device.
    • Tap the “+” icon to add a new accessory.
    • Look for Homebridge in the list of available devices and accessories.
    • Enter the Homebridge PIN code displayed on your terminal.

After completing these steps, the Evohome devices should be accessible within the Home app on your iOS device. You can then create scenes, automations, and control your Honeywell Evohome devices alongside your other HomeKit-compatible devices.

Remember that the effectiveness of Homebridge plugins can depend on community support and updates, so it’s a good idea to check for any recent developments or changes in the plugins you use. Always refer to the latest documentation for the Homebridge plugin you choose.

Is nest thermostat compatible with ring?

Nest thermostats and Ring devices are generally not directly compatible. Nest and Ring are separate brands and ecosystems, and they are owned by Google and Amazon, respectively. Each brand tends to operate within its own ecosystem, and direct integration between Nest and Ring devices is limited.

However, here are a few considerations and potential workarounds:

Voice Assistants:

  1. Google Home (Nest): If you have a Google Home or Nest device integrated into your smart home setup, you can control both Nest and Ring devices using voice commands through Google Assistant. For example, you can say, “Hey Google, set the Nest thermostat to 72 degrees” or “Hey Google, show me the Ring doorbell.”

However Google Home doesn’t provide direct integration with Ring devices for creating routines and compatibility can be limited.

For more details see this:

https://www.bobvila.com/articles/does-ring-work-with-google-home/

2. Amazon Alexa (Ring):

Similarly, if you have Amazon Echo devices with Alexa, you can control your Ring devices and, to some extent, integrate them with other smart devices using Alexa routines.

To control a smart thermostat using a Ring device as a trigger through an Alexa routine, follow these general steps:

Set Up Smart Thermostat and Ring Device:

Ensure your smart thermostat is properly installed and connected to your home automation system.

Set up and configure your Ring device (e.g., Ring doorbell or Ring security camera) in the Ring app.

Connect Devices to Alexa

Open the Alexa app and go to the “Devices” tab.

Add your smart thermostat and Ring device to Alexa by enabling their respective skills or connecting them through the smart home section.

Create Alexa Routine:

Navigate to the “Routines” section in the Alexa app.

Tap on the “+” icon to create a new routine.

Choose the trigger for your routine, which will be the Ring device. Select “When this happens” and choose your Ring device as the trigger.

Define Actions for the Routine:

Tap on “Add action” to specify what happens when the Ring device triggers the routine.

Select “Smart Home” as the action type.

Choose your smart thermostat as the device.

Set the desired thermostat action (e.g., set temperature, turn on, turn off).

Adjust Additional Settings (Optional):


Customize the routine further by adding more actions or adjusting settings like delays or conditions.

You can include voice responses, notifications, or other smart home actions within the same routine.

Save and Test:


Save the routine, and it’s ready to use.

Test the routine by triggering the Ring device (e.g., motion detection or doorbell press) and observe the smart thermostat responding accordingly.

IFTTT (If This Then That):

IFTTT is a third-party platform that allows you to create custom automations between different devices and services. Both Nest and Ring devices usually support IFTTT. While this might not offer direct integration, it can provide a way to create customized interactions between them. For instance, you might create an applet that adjusts your Nest thermostat when a Ring doorbell detects motion.

Here’s a general guide to creating a routine in Google Home to control a Nest thermostat using a Ring device trigger via IFTTT:

Setting up an IFTTT Applet:

  1. Sign Up or Log In to IFTTT:
    • If you don’t have an IFTTT account, sign up for one. If you have an account, log in to the IFTTT website or mobile app.
  2. Connect Ring and Nest Accounts:
    • Connect both your Ring and Nest accounts to IFTTT.
  3. Create a New Applet:
    • Click on your profile icon and select “Create” to start a new applet.
  4. Set the Trigger (If This):
    • Click on “This” to choose a trigger service. Search for and select “Ring” as the trigger service.
    • Choose a specific trigger, such as “Motion Detected” on your Ring device.
  5. Configure Trigger Settings:
    • Follow the prompts to set up the trigger settings, specifying the Ring device and conditions for the trigger.
  6. Set the Action (Then That):
    • Click on “That” to choose an action service. Search for and select “Google Assistant” as the action service.
    • Choose the action you want to perform, such as setting the temperature on your Nest thermostat.
  7. Configure Action Settings:
    • Follow the prompts to set up the action settings, specifying the Nest thermostat and the desired temperature or mode.
  8. Review and Finish:
    • Review the applet to ensure the trigger and action settings are correct.
    • Click on “Finish” to save and activate the applet.

Enabling Google Assistant Integration:

  1. Open Google Home App:
    • Launch the Google Home app on your mobile device.
  2. Tap on your Profile:
    • Tap on your profile icon in the top-right corner.
  3. Settings:
    • Go to “Settings.”
  4. Google Assistant Services:
    • Tap on “Services” and then “Explore.”
  5. Search for IFTTT:
    • Search for IFTTT and connect your Google Assistant to your IFTTT account.

Testing the Routine:

  1. Trigger the Ring Device:
    • Test the applet by triggering the Ring device (e.g., causing motion near the Ring camera).
  2. Check Nest Thermostat:
    • Verify that the Nest thermostat responds according to the configured action.

Additional Considerations:

  • Synchronization: IFTTT applets may have a slight delay, so keep that in mind when setting up time-sensitive actions.
  • Compatibility Updates: Since the smart home landscape evolves, check for updates or new features in the official apps and documentation for Ring, Nest, and IFTTT.

Please note that the availability of features and integrations can change over time, so always check the official websites and support documentation for the latest information.

Smart Home Hubs:

If you use a smart home hub like Samsung SmartThings, you may find more flexibility in creating custom automations involving devices from different ecosystems. Smart home hubs act as intermediaries, allowing you to create more complex routines.

Always check the official support documentation for both Nest and Ring devices for the latest information on integrations and compatibility. New updates, features, or partnerships may have been introduced since my last knowledge update in January 2022.

Best Ring Compatible Thermostats

Ring, owned by Amazon, has primarily focused on smart home security devices, including video doorbells, security cameras, and alarm systems. However, Ring doesn’t manufacture smart thermostats directly. If you’re looking for a thermostat that is compatible with the Ring ecosystem, you might consider choosing a thermostat that works well with Amazon Alexa.

Ring devices can often be integrated with Amazon Alexa or other home automation systems , allowing you to control various smart home devices using voice commands. Many smart thermostats are compatible with Alexa and other home automation systems like Google home assistant, offering you the flexibility to control your thermostat using your Ring device or through the Alexa app.

However creating a  Google Home assistant routine to control a smart thermostat using Ring devices as triggers might be challenging due to the separate ecosystems of Ring and smart thermostats.

However, you can use a workaround involving IFTTT (If This Then That) or Amazon Alexa or other automation software like Wink etc to bridge the communication between Ring and smart thermostats, allowing you to indirectly control your smart thermostat through Alexa.

Following are best thermostat that have IFTT,Alexa and/ or wink which you can use to control Smart thermostat using Ring devices as trigger or vice versa. These are also smart thermostat that are compatible with various voice Control devices like Alexa or Google Home etc adding to the level of control you can have using voice commands.

Nest Learning Thermostat:

  • The Nest Learning Thermostat, produced by Nest (a subsidiary of Google), is a popular choice with advanced features like learning your temperature preferences over time. It’s known for its compatibility with various smart home ecosystems, including Amazon Alexa, Google Home assistant and IFTT.
  1. Learning Capabilities:
    • One of the standout features of the Nest Thermostat is its ability to learn and adapt to your heating and cooling preferences over time. Through machine learning algorithms, it analyzes your usage patterns and creates a personalized schedule to optimize energy efficiency.
  2. Energy-Saving Features:
    • The Nest Thermostat is designed to help users save energy and reduce utility bills. It provides insights into your energy usage and offers recommendations on how to conserve energy. The thermostat’s ability to automatically adjust temperatures when you’re away contributes to overall efficiency.
  3. Remote Control:
    • Users can control the Nest Thermostat remotely using the Nest mobile app. This allows you to adjust temperature settings, monitor energy usage, and receive notifications from anywhere with an internet connection.
  4. Integration with Smart Home Ecosystems:
    • The Nest Thermostat is compatible with various smart home ecosystems, including Google Assistant, Amazon Alexa, and Apple HomeKit. This enables users to control their thermostat using voice commands and integrate it into broader smart home routines.
  5. Sensor Support:
    • Nest offers additional temperature and occupancy sensors that can be placed in different rooms. These sensors help the thermostat to better understand the temperature needs of specific areas in your home, creating a more balanced and comfortable environment.
  6. Airwave Technology:
    • The Nest Thermostat features Airwave technology, which optimizes the use of your air conditioning system by using the fan to distribute cool air effectively after the compressor turns off.
  7. Farsight:
    • Farsight is a feature that activates the thermostat’s display when it detects movement, allowing you to see the current temperature, time, or weather information from a distance.
  8. Compatibility with HVAC Systems:
    • Nest Thermostats are designed to be compatible with a wide range of heating, ventilation, and air conditioning (HVAC) systems, making them suitable for many residential and commercial settings.

Click here for more detail, price review and ratings of Nest Learning Thermostat

Ecobee Smart Thermostat:

  • The Ecobee SmartThermostat is a highly regarded smart thermostat with built-in Alexa support. It offers precise control, room sensors for better temperature management, and integration with various smart home platforms including IFTT and Amazon Alexa.

Key Features:

  1. Built-in Alexa Voice Service:
    • One of the standout features of the Ecobee SmartThermostat is its built-in Amazon Alexa Voice Service. This allows users to control the thermostat using voice commands without the need for a separate Alexa-enabled device. Users can ask about the weather, set timers, play music, and more.
  2. SmartSensor Technology:
    • The SmartThermostat comes with a SmartSensor, which is a remote temperature and occupancy sensor. Placing these sensors in different rooms allows the thermostat to prioritize occupied areas and provide more balanced temperature control throughout the home.
  3. Energy Savings and Reports:
    • Similar to the Nest Thermostat, the Ecobee SmartThermostat focuses on energy savings. It provides detailed reports on energy usage, offers insights into how to reduce consumption, and suggests adjustments to optimize efficiency.
  4. Intelligent Comfort and Follow Me:
    • The thermostat uses Follow Me technology, leveraging data from multiple sensors to determine which rooms are occupied. It then adjusts the temperature to ensure comfort in the occupied spaces.
  5. Compatibility with HVAC Systems:
    • Ecobee SmartThermostats are compatible with a wide range of heating, cooling, and ventilation systems. This compatibility makes them suitable for various home setups.
  6. Touchscreen Display:
    • The SmartThermostat features a responsive and intuitive touchscreen display, making it easy for users to control the thermostat directly if needed.
  7. Remote Control via App:
    • Users can control the thermostat remotely using the Ecobee mobile app. This includes adjusting temperature settings, viewing energy reports, and managing thermostat schedules from anywhere with an internet connection.
  8. Integration with Smart Home Ecosystems:
    • The Ecobee SmartThermostat is compatible with popular smart home platforms, including Amazon Alexa, Google Assistant, Apple HomeKit, and Samsung SmartThings. This allows users to integrate the thermostat into broader smart home routines.
  9. Room Prioritization:
    • Users can set preferences for specific rooms, allowing the thermostat to prioritize comfort in those areas when adjusting temperature settings.

Click here for more detail, price review and ratings of Ecobee Smart Thermostat

Honeywell Home T9 Smart Thermostat:

  • The Honeywell Home T9 is a smart thermostat with remote sensor capabilities for multi-room temperature control. It works well with Amazon Alexa, providing voice control and integration with Alexa or Google home assistant routines along with IFTT.

Key Features:

  1. Smart Room Sensors:
    • One of the distinguishing features of the Honeywell Home T9 is its use of Smart Room Sensors. These wireless sensors can be placed in different rooms to measure both temperature and occupancy. The thermostat can then prioritize occupied rooms to ensure optimal comfort.
  2. Geofencing Technology:
    • The T9 utilizes geofencing technology to detect when you are approaching or leaving your home. This allows the thermostat to adjust temperatures based on your proximity, ensuring energy savings when the home is unoccupied.
  3. Adaptive Learning:
    • The thermostat features adaptive learning capabilities, which means it can learn your heating and cooling preferences over time. This learning process helps create a customized schedule that aligns with your routine.
  4. Integration with Smart Home Platforms:
    • The Honeywell Home T9 is compatible with popular smart home platforms, including Amazon Alexa, Google Assistant, and Apple HomeKit. This allows users to control the thermostat using voice commands and integrate it into broader smart home ecosystems.
  5. Remote Control via App:
    • Users can control the T9 remotely using the Honeywell Home app. This app provides a user-friendly interface for adjusting temperature settings, checking energy usage, and receiving alerts.
  6. Multi-Room Focus:
    • With the Smart Room Sensors, the T9 can focus on specific rooms to ensure they reach the desired temperature. This is particularly beneficial for homes with uneven heating or cooling distribution.
  7. C-Wire or C-Wire Adapter Compatibility:
    • The thermostat is compatible with homes that have a C-wire (common wire) or can be used with the included C-wire adapter for installations without a C-wire.
  8. Energy Usage Reports:
    • The Honeywell Home app provides detailed reports on energy usage, allowing users to track and analyze their HVAC system’s performance and make informed decisions to save energy.

Click here for more detail, price review and ratings of Honeywell Home T9 Smart Thermostat.

Emerson Sensi Touch Smart Thermostat:

  • The Sensi Touch thermostat by Emerson is known for its easy installation and compatibility with various smart home platforms, including Amazon Alexa. It’s a budget-friendly option with a touchscreen display. It is not compatible with IFTT but compatible with wink which is also supports rings devices.

Key Features:

  1. Touchscreen Display:
    • The Sensi Touch features a vibrant and responsive color touchscreen display. The intuitive interface allows users to easily navigate through settings, adjust temperature, and access various features directly from the thermostat.
  2. Wi-Fi Connectivity:
    • With built-in Wi-Fi connectivity, the Sensi Touch enables remote control through the Sensi app. Users can manage temperature settings, create schedules, and monitor energy usage from their smartphones or tablets.
  3. Compatibility with Smart Home Platforms:
    • The Sensi Touch is compatible with popular smart home platforms, including Amazon Alexa, Google Assistant, and Apple HomeKit. This allows users to control the thermostat using voice commands and integrate it into broader smart home ecosystems.
  4. Geofencing Technology:
    • The thermostat utilizes geofencing to detect when users are approaching or leaving their homes. This feature helps optimize energy savings by adjusting temperature settings based on the occupants’ proximity.
  5. Flexible Scheduling:
    • Users can create customized schedules to align with their daily routines. The Sensi Touch offers flexibility in programming, allowing for different temperature settings at various times of the day.
  6. Energy Usage Reports:
    • The Sensi app provides detailed reports on energy usage, enabling users to track and analyze their HVAC system’s performance. This information helps users make informed decisions to enhance energy efficiency.
  7. C-Wire or C-Wire Adapter Compatibility:
    • The thermostat is designed to be compatible with homes that have a C-wire (common wire). For installations without a C-wire, the Sensi Touch can be used with the included C-wire adapter.
  8. Smart Alerts and Notifications:
    • The Sensi Touch can send smart alerts and notifications to the user’s mobile device. These alerts may include reminders for filter changes, system maintenance, or temperature-related issues.

Click here for more detail, price review and ratings of Emerson Sensi Touch Smart Thermostat.

Lux Kono smart Thermostat

The Lux Kono Smart Thermostat offers a distinctive dial-type interface, eschewing a touchscreen. With a versatile heating configuration of 2H/1C for conventional systems and 2Ht/1C for heat pumps, it caters to various HVAC setups. Cooling is supported with a single stage. The Auto Home/Away feature employs geofencing via the app, enhancing energy efficiency.

While lacking a smart remote sensor, the Lux Kono integrates seamlessly into home automation ecosystems, supporting voice commands via Alexa, Google Assistant, and Siri. Unfortunately, it doesn’t support IFTTT. The device requires a C wire for power but includes an adapter for added convenience.

Unlike learning thermostats, the Lux Kono doesn’t adapt over time but compensates with insightful usage reports. Regrettably, it lacks an in-built motion sensor for occupancy detection and doesn’t provide humidity control. In summary, the Lux Kono Smart Thermostat is a solid choice for those seeking a reliable, user-friendly device with comprehensive home automation integration and energy management features.

Click here for more detail, price review and ratings of Lux Kono smart Thermostat

GLAS Smart Thermostat by Johnson Controls

The GLAS Smart Thermostat by Johnson Controls stands out with its sophisticated touch screen interface, providing an intuitive and interactive user experience. With support for 2H/2C heating stages for conventional systems and 2H/2C/2 heat pumps with Aux Heat, as well as 2 cooling stages, it offers versatile compatibility with various HVAC setups.

The Auto Home/Away feature, driven by geofencing through the app, enhances energy efficiency by adjusting settings based on your location. Although lacking a smart remote sensor, the GLAS integrates seamlessly into smart homes, supporting voice commands via Alexa and Google Assistant. Additionally, it boasts a built-in Microsoft Cortana voice assistant.

Powering the GLAS requires a C wire, but the included adapter simplifies installation. While it doesn’t feature learning capabilities, the thermostat offers comprehensive statistics of past days and an energy-saving ratio for users to monitor and optimize energy consumption.

One notable feature is the in-built motion sensor, functioning as a form of geofencing. This, coupled with air quality sensors and outdoor temperature information, allows the GLAS to intelligently operate your ventilator, promoting maximum air quality with minimal energy usage.

However, it’s important to note that the GLAS lacks direct humidity control. Instead, it leverages its air quality sensors and outdoor temperature information to optimize ventilator operation intelligently.

In conclusion, the GLAS Smart Thermostat impresses with its sleek design, touch screen interface, and advanced features like the built-in motion sensor and intelligent ventilator control. It’s an excellent choice for those seeking a feature-rich thermostat with robust home automation integration.

Click here for more detail, price review and ratings of GLAS Smart Thermostat by Johnson Control.

Amazon Smart thermostat

The Amazon Smart Thermostat presents a budget-friendly option for those seeking a reliable smart thermostat with advanced features. With its commendable set of functionalities, it caters to users looking for a balance between cost-effectiveness and smart home automation.

Key Features:

  1. Touch Screen: The thermostat boasts a user-friendly touch screen interface, making it easy to navigate and program settings.
  2. Heating and Cooling Stages: With three heating and three cooling stages, this thermostat is well-equipped to handle a variety of climate control needs.
  3. 7-Day Programmable: The 7-day programmable feature allows users to set different temperature schedules for each day of the week, providing flexibility and energy savings.
  4. Auto Home/Away Feature: Utilizing geofencing through the Alexa app on your phone, the thermostat intelligently adjusts settings based on your location, contributing to energy efficiency.
  5. Smart Remote Sensor: Unfortunately, the Amazon Smart Thermostat lacks a smart remote sensor, limiting its ability to optimize temperature control in different areas of the home.
  6. Home Automation Integration: The device seamlessly integrates with Amazon Alexa, allowing users to control the thermostat using voice commands and incorporate it into their Alexa routines.
  7. Power Source: The thermostat operates on C-wired power, though it’s worth noting that a power adapter comes at an additional cost.
  8. Warranty: Backed by a one-year warranty, users can feel confident in the durability and performance of this thermostat.
  9. Smart/Learning Thermostat (Auto Schedule): The thermostat’s learning capabilities, referred to as “hunches,” enable it to adapt to your habits and preferences over time, enhancing efficiency.
  10. Built-in Motion Sensor (Occupancy): Regrettably, the thermostat lacks a built-in motion sensor for occupancy detection, missing an opportunity to further optimize energy usage.
  11. Humidity Control: The device does not include humidity control features, which might be a drawback for users in regions where humidity levels play a significant role in comfort.

Best Feature/s:

The standout feature of the Amazon Smart Thermostat is its affordability combined with learning capabilities. It introduces the concept of “hunches,” allowing the thermostat to adapt and anticipate your preferences, ultimately contributing to energy savings.

Remark:

This thermostat is a cost-effective solution for users heavily invested in the Amazon Alexa ecosystem. Its learning capabilities, though not as advanced as some premium models, make it an attractive option for those seeking a balance between budget and smart functionality. However, the absence of certain features like a smart remote sensor and built-in motion sensor might be notable for users with specific requirements.

Click here for more detail, price review and ratings of Amazon Smart thermostat

Wyze smart Thermostat

The Wyze Smart Thermostat brings a mix of affordability and intelligence to the smart home climate control arena, offering a feature-rich experience that caters to a broad audience.

Key Features:

  1. Dial-Type Interface: The absence of a touch screen is compensated by a user-friendly dial interface, providing a tactile and intuitive way to interact with the thermostat.
  2. Heating and Cooling Stages: With four heating stages for heat pumps and two for conventional systems, the thermostat is versatile enough to handle a variety of HVAC setups.
  3. 7-Day Programmable: The thermostat’s 7-day programmable feature adds flexibility, allowing users to customize temperature schedules for different times of the week.
  4. Auto Home/Away Feature: Utilizing geofencing through the phone app, the thermostat intelligently switches between Home and Away modes, enhancing energy efficiency.
  5. Smart Remote Sensor: Supporting up to six remote sensors for temperature, humidity, and motion, the Wyze Smart Thermostat offers a comprehensive solution to eliminate hot and cold spots in your home.
  6. Home Automation Integration: Compatible with popular platforms like Alexa, Google, and Bluetooth, the thermostat seamlessly integrates into your smart home ecosystem.
  7. Power Source: The thermostat operates on a C wire and includes a power adapter cable, ensuring a hassle-free installation process.
  8. Smart/Learning Thermostat (Auto Schedule): While lacking auto-schedule capabilities, the thermostat utilizes AI learning based on routines to provide energy-saving tips and enhance overall efficiency.
  9. Built-in Motion Sensor (Occupancy): The in-built motion sensor not only contributes to energy efficiency by enabling the thermostat to switch to Home mode but also aids in adjusting temperature based on room occupancy.
  10. Humidity Control: The inclusion of humidity control is a notable feature, ensuring a comfortable and customizable indoor environment.

Best Feature/Remarks:

The standout features of the Wyze Smart Thermostat include its innovative geofencing Home/Away switch and the integration of multiple remote sensors. The thermostat’s ability to adjust temperature control based on room occupancy and its compatibility with other Wyze smart devices further enhance its value.

Remarks:

While the thermostat offers a comprehensive set of features, it’s important to note its lack of compatibility with Apple HomeKit and IFTTT. Additionally, although it incorporates AI learning for energy-saving tips, the absence of an auto-schedule feature might be a drawback for users seeking a fully autonomous thermostat experience. Nevertheless, the Wyze Smart Thermostat presents a cost-effective and intelligent solution for those looking to upgrade their home climate control system.

Click here for more detail, price review and ratings of Wyze smart Thermostat

Setting up an IFTTT Applet:

  1. Sign Up or Log In to IFTTT:
    • If you don’t have an IFTTT account, sign up for one. If you have an account, log in to the IFTTT website or mobile app.
  2. Connect Ring and Alexa Accounts:
    • Connect both your Ring and Alexa accounts to IFTTT.
  3. Create a New Applet:
    • Click on your profile icon in the top-right corner and select “Create” to start a new applet.
  4. Set the Trigger (If This):
    • Click on “This” to choose a trigger service. Search for and select “Ring” as the trigger service.
    • Choose a specific trigger, such as “Motion Detected” on your Ring device.
  5. Configure Trigger Settings:
    • Follow the prompts to set up the trigger settings, specifying the Ring device and conditions for the trigger.
  6. Set the Action (Then That):
    • Click on “That” to choose an action service. Search for and select “Alexa” as the action service.
    • Choose the Alexa action you want to perform. For example, you might choose “Send an announcement.”
  7. Configure Action Settings:
    • Follow the prompts to set up the action settings, specifying the Alexa device and the announcement you want to make.
  8. Review and Finish:
    • Review the applet to ensure the trigger and action settings are correct.
    • Click on “Finish” to save and activate the applet.

Creating an Alexa Routine:

  1. Prepare Smart Devices:
    • Ensure your smart thermostat is installed and connected to your home system.
    • Set up your Ring device (e.g., doorbell or security camera) in the Ring app.
  2. Integrate with Alexa:
    • Open the Alexa app, navigate to “Devices,” and link your smart thermostat and Ring device.
  3. Craft an Alexa Routine:
    • In the Alexa app, go to “Routines” and create a new routine using the “+” icon.
    • Select your Ring device as the trigger for the routine.
  4. Specify Routine Actions:
    • Add actions to the routine by choosing “Smart Home” and selecting your smart thermostat.
    • Define the thermostat action you want when the Ring device triggers the routine.
  5. Customize (Optional):
    • Personalize the routine by adding more actions or adjusting settings like delays or conditions.
    • Include voice responses or notifications as needed.
  6. Save and Test:
    • Save the routine, and it’s ready to use.
    • Test the routine by activating the Ring device, such as through motion detection, and observe the smart thermostat responding accordingly.

Remember to refer to the latest documentation from Amazon, Ring, and your smart thermostat manufacturer for any updates or specific instructions.


How to sync multiple ecobee thermostats?

What is synching of multiple thermostats?

Syncing multiple thermostats refers to the process of coordinating the settings and operations of multiple thermostats within a single heating, ventilation, and air conditioning (HVAC) system. This is often done in larger buildings or homes with multiple heating or cooling zones. The goal is to ensure that all thermostats work together to maintain a consistent and efficient temperature throughout the entire space.

Here are some key aspects of syncing multiple thermostats:

  1. Centralized Control: Multiple thermostats are connected to a central control system that oversees the entire HVAC system. This central control can be a smart home automation system or a dedicated HVAC control panel.
  2. Communication: Thermostats need a means of communication to share information about the current temperature, setpoints, and system status. This communication can be wired or wireless, depending on the system’s design.
  3. Zoning: Syncing thermostats is particularly useful in buildings with zoning systems. Zoning allows different areas or zones of a building to have independent temperature control. Each thermostat is responsible for a specific zone, and they work together to create a comfortable environment.
  4. Energy Efficiency: Syncing thermostats can contribute to energy efficiency by optimizing the HVAC system’s overall performance. The system can adapt to the specific needs of each zone, reducing energy consumption and costs.
  5. Temperature Consistency: The synchronization ensures that the temperature is consistent throughout the entire building. This is important for occupant comfort and can be critical in environments where specific temperature conditions are required, such as in commercial spaces or healthcare facilities.

The Synching  Ecobee Thermostat by €grouping

Ggrouping Ecobee thermostats can be done through the Ecobee web portal or mobile app. Here are general steps based on the typical process:

Grouping Ecobee Thermostats:

  1. Access the Ecobee Web Portal or Mobile App:
    • Log in to your Ecobee account using the web portal on a computer or the mobile app on your smartphone or tablet.
  2. Navigate to Thermostats:
    • Locate the section in the web portal or app where you manage your thermostats.
  3. Create a Group:
    • Look for an option to create a group or add multiple thermostats to a common group. This is often found in the settings or grouping options.
  4. Name the Group:
    • Give the group a name that helps you identify it, especially if you are grouping thermostats in different areas of your home.
  5. Select Thermostats:
    • Choose the Ecobee thermostats you want to include in the group. You can usually select multiple thermostats to be part of the same group.
  6. Configure Group Settings:
    • Depending on the Ecobee model and software version, you may have options to configure group settings such as temperature settings, occupancy sensing, and system mode.
  7. Save Changes:
    • Save the changes you’ve made to apply the group settings.
  8. Verify Group Operation:
    • After creating the group, check to ensure that the thermostats within the group are operating as expected. You may want to verify that they share the same system mode and any other settings you’ve configured.

Sychronize Various behaviours….

Its not sufficient to group the thermostats.

In the group settings section, it is crucial for the thermostats to align their specific behaviors.

For instance, you can coordinate your program whether you’re at home or away, and you only need to make adjustments from any of the thermostats.

You have the flexibility to select which settings to synchronize. In cases where thermostats govern distinct units, you may opt not to synchronize certain reminders, such as filter replacements, given that the usage patterns of individual units may vary.

Disclaimer: This service may have been non-functional for the past 8 months, dating back to March 2023.

A recent discussion on the Ecobee subreddit has highlighted a significant issue with this feature, originating from Ecobee’s end. Regrettably, the problem persists even now, spanning the last 8 months.

According to the thread, the Grouping feature accessible through the Web Portal has been temporarily disabled to address other operational issues.

While there is an assurance that it will eventually be restored, as of now, there is no estimated time of restoration. Updates regarding the restoration will be provided on this Reddit post when available.

Customers reaching out to the customer support have reportedly received the response that there is no confirmation on when, or if, this issue will be resolved.

For the latest updates, please refer to the provided thread link. Alternatively, you can contact customer support to inquire about the current status of the issue.

Thermostat group not sharing system mode anymore.
byu/GrillDealing inecobee

How does the honeywell t9 thermostat work

In the realm of smart home technologies, thermostats have evolved from simple temperature regulators to sophisticated devices that offer unparalleled control and efficiency. Among the standout contenders is the Honeywell T9 thermostat, renowned for its advanced features and intuitive design. In this comprehensive exploration, we delve into the inner workings of the Honeywell T9 thermostat, shedding light on its core functionalities, smart capabilities, and how it seamlessly integrates into the modern connected home.

The Foundation of the Honeywell T9:

  1. Smart Connectivity:
    • At the heart of the Honeywell T9 is its smart connectivity. The thermostat is equipped with Wi-Fi capabilities, enabling seamless communication with other smart devices and allowing users to remotely control and monitor their home’s climate through a dedicated app.
  2. Multi-Room Sensors:
    • One of the standout features of the T9 is its compatibility with Honeywell’s Smart Room Sensors. These wireless sensors provide the thermostat with real-time data on temperature and occupancy in different rooms, allowing for precise and customizable climate control throughout the home.

Core Functionalities:

  1. Temperature Control:
    • The primary function of any thermostat is temperature control, and the Honeywell T9 excels in this regard. Users can easily set their preferred temperatures for different times of the day, creating personalized schedules that align with their routines.
  2. Geofencing Technology:
    • The T9 incorporates geofencing technology, a smart feature that leverages the location of users’ smartphones. When the last connected smartphone leaves a specified geographic area (e.g., home), the thermostat can automatically adjust the temperature to conserve energy. Upon return, the thermostat readies the home for comfort.
  3. Adaptive Recovery:
    • Adaptive Recovery is a feature that learns from past heating and cooling cycles to predict the optimal time to start the system, ensuring that the desired temperature is reached at the scheduled time without unnecessary energy consumption.
  4. Fan Control:
    • The T9 allows users to control the fan independently, offering options such as On, Off, and Auto. This level of control can enhance air circulation and contribute to energy efficiency.

The Intelligence Behind the Scenes

  1. Smart Room Sensors:
    • The Honeywell T9 thermostat can connect to and integrate data from Smart Room Sensors positioned in various rooms. These sensors communicate wirelessly with the thermostat, providing real-time temperature and occupancy information. This setup enables the thermostat to prioritize occupied rooms and adjust the temperature accordingly.
  2. Occupancy Detection:
    • The thermostat’s ability to detect occupancy through Smart Room Sensors allows for dynamic temperature adjustments. If a room is unoccupied, the T9 can adjust the temperature to conserve energy. When a room becomes occupied, the thermostat responds promptly to ensure comfort.
  3. Remote Access:
    • With the Honeywell Home app, users can remotely control their T9 thermostat from anywhere with an internet connection. Whether adjusting the temperature before arriving home or checking energy usage patterns, remote access adds a layer of convenience and control to the user experience.
  4. Voice Control Integration:
    • The T9 is compatible with popular voice assistants like Amazon Alexa and Google Assistant. This integration allows users to control the thermostat using voice commands, adding another dimension to hands-free home automation.

User-Friendly Interface:

  1. Touchscreen Display:
    • The T9 features a sleek and responsive touchscreen display that serves as the central interface for users. The intuitive layout provides easy access to temperature settings, schedules, and additional features.
  2. Alerts and Notifications:
    • The thermostat can generate alerts and notifications to keep users informed about system status, filter replacement reminders, and potential issues. This proactive approach enhances user awareness and system maintenance.

How to Set Up and Use the Honeywell T9:

  1. Installation:
    • The Honeywell T9 is designed for easy installation and can replace most 24V heating and cooling systems. The included step-by-step guide and video tutorials simplify the installation process, making it accessible to homeowners.
  2. App Setup:
    • After physical installation, users need to download the Honeywell Home app, create an account, and follow the guided setup to connect the thermostat to their home Wi-Fi network. This establishes the foundation for remote control and monitoring.
  3. Smart Room Sensors:
    • Pairing Smart Room Sensors with the T9 involves a straightforward process through the app. Users can strategically place the sensors in different rooms to enhance the thermostat’s ability to adapt to occupancy and temperature variations.
  4. Customizing Settings:
    • Once connected, users can customize temperature settings, create schedules, and configure other preferences through the app or directly on the thermostat’s touchscreen interface.

Energy Efficiency and Cost Savings:

  1. Optimized Scheduling:
    • The T9’s scheduling capabilities empower users to create customized schedules based on their daily routines. This can lead to significant energy savings by ensuring that the heating or cooling system operates efficiently when needed and remains dormant when unnecessary.
  2. Geofencing and Adaptive Recovery:
    • Geofencing technology and Adaptive Recovery work in tandem to optimize energy usage. Geofencing minimizes energy consumption when the home is unoccupied, while Adaptive Recovery ensures the system operates efficiently to meet scheduled temperature changes.

Considerations and Tips:

  1. Sensor Placement:
    • Strategically place Smart Room Sensors in areas that accurately reflect the temperature and occupancy patterns of your home. Proper sensor placement enhances the thermostat’s ability to provide precise and customized climate control.
  2. Firmware Updates:
    • Stay informed about firmware updates for the Honeywell T9. Regular updates may introduce new features, improve performance, and enhance compatibility with other smart home devices.
  3. Integration with Smart Home Ecosystem:
    • Explore the compatibility of the T9 with other smart home devices and ecosystems. This integration can unlock additional automation possibilities and streamline the overall smart home experience.

Conclusion:

The Honeywell T9 thermostat represents a pinnacle of innovation in smart home climate control. Its seamless integration of smart features, such as geofencing, Smart Room Sensors, and adaptive technologies, sets it apart in the competitive landscape. By understanding the inner workings of the T9, users can harness its capabilities to create a comfortable, energy-efficient home environment that adapts to their lifestyles. As smart home technologies continue to evolve, the Honeywell T9 thermostat stands as a testament to the intelligent, connected future of home automation.

Does ecobee Thermostat have batteries?

In the ever-evolving landscape of smart home technology, the Ecobee thermostat has emerged as a frontrunner in delivering intelligent climate control solutions. However, the question of whether Ecobee thermostats are equipped with batteries has sparked some confusion among users. Let’s delve into the intricacies and demystify the power configuration of Ecobee thermostats.

Ecobee Thermostat Power Dynamics:

The Ecobee thermostat itself does not have a battery backup. Unlike some smart thermostats on the market, Ecobee devices are primarily designed to be hardwired into existing HVAC systems. This means they draw power directly from the HVAC system and do not rely on an internal battery to maintain functionality during power interruptions.

The absence of a battery backup in the Ecobee thermostat underscores the importance of a stable power supply for uninterrupted operation. Users relying on Ecobee thermostats should ensure a consistent power source to maintain the device’s core functionality.

Room Sensors and Battery Dependency:

While the Ecobee thermostat may not feature a built-in battery backup,  the Ecobee room sensors do utilize batteries. These sensors, which play a crucial role in enhancing the thermostat’s capabilities, typically come equipped with batteries to power their wireless communication with the thermostat.

Room sensors are integral components of the Ecobee ecosystem, allowing users to monitor and adjust temperature settings in different areas of their homes. The use of batteries in these sensors adds a layer of flexibility, enabling users to place them strategically without the constraints of a wired connection.

Evolution of Ecobee Technology:

The absence of a battery backup in the Ecobee thermostat aligns with the brand’s commitment to energy efficiency and sustainable practices. By relying on the HVAC system for power, Ecobee aims to minimize its environmental footprint while providing users with reliable and intelligent climate control.

Room Sensors: Enhancing Ecobee’s Capabilities:

Ecobee’s use of batteries in room sensors not only adds a practical dimension to their placement but also enhances the thermostat’s overall capabilities. These sensors, equipped with temperature, humidity, and motion-detecting features, contribute to a more nuanced and responsive climate control experience.

The ability of room sensors to operate on batteries underscores their wireless nature, providing users with the flexibility to position them where they are most effective without the constraints of wiring. This is particularly beneficial for homes where running additional wires may be impractical.

Innovation in Motion:

One standout feature in the Ecobee thermostat ecosystem is the integration of motion sensors. While the thermostat itself may lack certain battery-dependent features, the inclusion of motion sensors opens up new possibilities for energy efficiency and personalized comfort.

The in-built motion sensors can detect occupancy in a room, allowing the thermostat to adjust settings based on activity. An interesting twist comes with the ability of the thermostat to switch to Home mode if the in-built motion sensor senses activity, even if the user’s phone is outside the geofencing radius. This dynamic response to occupancy aligns with Ecobee’s commitment to smart, adaptive climate control.

Conclusion:

While the thermostat itself may not have a built-in battery backup, it draws power directly from the HVAC system. This design choice emphasizes a reliance on a stable power source for consistent operation.

On the other hand, the inclusion of batteries in room sensors enhances the flexibility and functionality of the Ecobee thermostat ecosystem. The use of batteries in room sensors allows for strategic placement without the constraints of wiring, contributing to a more adaptable and responsive smart home climate control system.

How Honeywell Evohome work?

The Honeywell Evohome is a sophisticated smart heating system designed to bring unparalleled control and efficiency to home heating. With a combination of a wireless relay box, battery-powered thermostats on radiators, a touchscreen panel, and the convenience of a mobile app, the Evohome system offers a comprehensive solution for zoning and managing temperatures in different areas of a home. In this exploration, we will delve into the key components and functionality of the Honeywell Evohome system, understanding how it operates to provide users with optimal comfort and energy efficiency.

Honeywelll Evohome componenets:

  1. Wireless Relay Box: Connects to your boiler and facilitates communication with the other components in the system.
  2. Battery-Powered Thermostats: Installed on individual radiators, these thermostats provide local control for specific zones.
    1. Touchscreen Panel:The main thermostat controller with atouchscreen interface, allowing for centralized control and monitoring. It syncs with the boiler relay switch over Wi-Fi.
  3. Zone Control: The system supports up to 12 zones, and each zone can include multiple radiators. This zoning capability allows for precise temperature control in different areas of the home.
  4. Overall Temperature Control: The main thermostat controller enables you to set an overall maximum temperature for the entire system, providing a degree of central control.
  5. Evohome App: The system can be controlled and monitored remotely using the Evohome app. This allows users to make adjustments, set schedules, and monitor the heating system from a mobile device.
  6. No Separate Hub: Unlike some other smart home systems, it seems that the Evohome system does not require a separate hub for app connectivity, simplifying the setup.

Here’s an overview of how it works:

    1. Central Controller:
      • The system is managed by a central controller, often a touchscreen panel or a mobile app.
      • The controller communicates wirelessly with individual components to coordinate heating activities.
    2. Smart Radiator Valves (HR92):
      • These valves replace traditional radiator valves and control the flow of hot water into specific radiators.
      • Each valve is equipped with a temperature sensor to monitor and regulate the room temperature.
    3. Underfloor Heating Controls:
      • For areas with underfloor heating, the system integrates with underfloor heating controls to adjust the temperature in those zones.
    4. Wireless Room Thermostats (ATC928G):
      • These thermostats measure the temperature in specific rooms and wirelessly communicate with the central controller.
      • They allow users to set desired temperatures for individual rooms or zones.
    5. Internet Gateway (RFG100):
      • The Internet Gateway connects the Evohome system to the internet, enabling remote control via a mobile app or web interface.
      • It facilitates firmware updates and allows users to monitor and adjust their heating system from anywhere.
    6. Boiler Relay (BDR91):
      • The boiler relay communicates with the central controller and the boiler to manage the heating system efficiently.
      • It controls the flow of hot water to the radiators based on the signals received from the central controller.
    7. OpenTherm Technology:
      • Evohome often utilizes OpenTherm technology for communication between the central controller and the boiler.
      • OpenTherm enables more precise control over the boiler, optimizing energy efficiency.
    8. Adaptive Learning:
      • The system may incorporate adaptive learning algorithms, adjusting heating schedules based on user preferences and the thermal characteristics of the home.
    9. Energy Monitoring:
      • Some versions of Evohome offer energy monitoring features, allowing users to track their heating usage and optimize for energy efficiency.
    10. Zoning Capabilities:
      • One of the key features is the ability to create multiple zones within a home, each with its own temperature control.You can have up to 12 zones in your house, each zone equipped with  multiple radiators.
      • This zoning capability allows for personalized comfort and energy savings in unused areas.

    Honeywell Evohome’s technical sophistication lies in its wireless communication, precise temperature control, and the ability to create a customized heating strategy for different parts of the home.

How to control Evohome?

Controlling the Honeywell Evohome system involves using the central controller, mobile app, or web interface. Here’s a step-by-step guide on how to control Evohome:

    1. Central Controller:
      • Use the touchscreen interface on the central controller (which could be a physical device installed in your home) to access and control the heating system.
      • Navigate through the menu options to set temperatures for individual zones, create schedules, and make adjustments.
    2. Mobile App:
      • Download and install the Honeywell Evohome app on your smartphone or tablet (available for iOS and Android).
      • Connect the app to your Evohome system using the provided credentials and pairing instructions.
      • Once connected, you can remotely control your heating system from anywhere with an internet connection.
      • Adjust temperatures for different zones, create schedules, and monitor your system’s status.
    3. Control via Home automation devicesHoneywell Evohome offers integration with popular smart home platforms like Alexa, Google Assistant, and IFTTT (If This Then That), allowing you to control your heating system through voice commands or automate it based on various triggers.
  1. Web Interface:
    • Access the Honeywell Evohome web interface through a compatible web browser.
    • Log in with your account credentials, which should be the same as those used for the mobile app.
    • Similar to the mobile app, the web interface allows you to control and monitor your heating system remotely.
  2. Zone Control:
    • Utilize the zoning capabilities of the Evohome system by setting different temperatures for each zone in your home.
    • Adjust temperature settings for specific rooms or areas based on your preferences and usage patterns.
  3. Scheduling:
    • Create heating schedules to automate temperature changes throughout the day.
    • Set different schedules for weekdays and weekends or customize based on your daily routines.
  4. Adaptive Learning (if applicable):
    • If your Evohome system has adaptive learning capabilities, let it learn your preferences and adjust heating schedules accordingly.
    • Adaptive learning can optimize energy efficiency by adapting to your habits over time.
  5. Away Mode:
    • Activate the “Away” mode when you’re not at home to save energy. This mode lowers the overall temperature to a predefined setting.
  6. Monitor Energy Usage:
    • Keep an eye on your heating system’s energy usage through the app or web interface.
    • Some versions of Evohome provide energy monitoring features to help you make informed decisions about your heating habits.


Is it hard to install a smart thermostat?

The difficulty of installing a smart thermostat can vary depending on your existing HVAC (heating, ventilation, and air conditioning) system, your comfort level with electrical work, and the specific model of the smart thermostat. In general, many smart thermostat installations are designed to be user-friendly, and manufacturers provide detailed instructions to guide you through the process. Here are some general steps and considerations:


General Installation Steps:

Turn Off Power:


Before starting any installation work, turn off the power to your HVAC system at the circuit breaker to ensure safety.

Check Compatibility:


Confirm that the smart thermostat is compatible with your HVAC system. Most smart thermostat manufacturers provide online compatibility checkers on their websites.

Remove Old Thermostat:


Remove the cover of your existing thermostat and take note of the wiring connections. Label each wire according to its terminal on the old thermostat.

Disconnect the wires from the old thermostat.

Install Mounting Plate:


Mount the new thermostat’s baseplate on the wall using the provided screws. Ensure it is level.

Connect Wires:


Connect the labeled wires to the corresponding terminals on the new thermostat. Follow the manufacturer’s wiring diagram and instructions carefully.

Attach Thermostat:


Attach the thermostat to the baseplate. Some thermostats simply snap onto the baseplate, while others require securing with screws.

Power On:


Turn the power back on at the circuit breaker. The thermostat should power up.

Configure Settings:


Follow the on-screen instructions or use the mobile app to configure the thermostat settings, including Wi-Fi setup and any system-specific configurations.

Test and Monitor:


Test the heating and cooling functions to ensure they are working properly. Monitor the thermostat to make sure it maintains the desired temperatures.

Considerations:

Compatibility: Ensure that the smart thermostat is compatible with your HVAC system. This information is usually available in the thermostat’s documentation or on the manufacturer’s website.


C-Wire: Some smart thermostats require a “common” wire (C-wire) for continuous power. If your existing setup doesn’t have one, you may need to follow additional steps or use alternative power sources provided by the thermostat.


Skill Level: If you’re uncomfortable working with electrical components or if your HVAC system is complex, it might be best to hire a professional installer.


Manufacturer Support: Most manufacturers offer customer support, and some even provide online installation videos or live assistance.


If you have any doubts or concerns, it’s advisable to consult the installation manual provided by the thermostat manufacturer or seek professional assistance to ensure a safe and proper installation.